10 Tips to Improve the Audio Quality in Your Video Recordings

We may think of video as a visual medium, but it’s the audio that tells us the story. Great audio connects the viewer to the visuals and keeps them engaged. Poor-quality audio disconnects the viewer from the content; the brain must work harder to understand, and fatigue happens quickly. In a pre-recorded lecture, it’s also a barrier to accessibility. Luckily, better audio is within everyone’s grasp…
Our 10 tips presume that you are pre-recording a video lecture in a home office setting with a desktop or laptop computer (although many of the tips are applicable to synchronous online lectures as well). To create a video lecture, you may use a tool like PowerPoint, MacVideo or Echo360. These tools are useful, but the ability to edit audio is limited. If you want great audio, consider a tool that has dedicated audio editing options like Camtasia. A more feature-rich tool will give you the ability to easily edit your audio (add, remove) and may have additional functions like noise cancelling or other filters to improve your audio quality. Also look for a tool that allows you to preview the volume in decibels (see tip 6).
Save yourself time and effort by getting things right in the recording stage!
10 tips for great audio:
1 – Write a script
As a content expert you have likely given your lectures many times. You know the content inside and out. Even if you’re comfortable speaking without prepared notes, avoid the urge to just start recording and talk. Recording audio for delivery online is quite different than in person.
Writing a script helps you to be concise – recorded lectures should be chunked in small segments, typically less than 10 minutes. As you write, think about how someone who is vision-impaired may experience your audio. They may not be able to rely on the visuals so what you say and how you say it is crucial to their learning. Avoid terms like “as you can see here….”
Having a script will also ensure you say everything you need to, produce a transcript for greater accessibility and save you time. When recording you will likely have to stop and re-record. Having a script allows you to do this without losing your place.
2 – Use simple, clear language
When writing your script try to keep the language simple and clear. Short words are easier to say and to understand from the listener’s perspective. Complex words may highlight your expertise but sometimes they introduce confusion and ambiguity. Try to say more with less. Avoid alliteration or words that are difficult to pronounce. Make sure you are clear on how to pronounce unfamiliar words prior to recording.
3 – Find the best place to record audio
Getting the best quality recording starts with reducing ambient and distracting noises. Find a space that is free from noise like fans, people, open windows, and so on. Turn off your cellphone and email to avoid notification alerts during recording. A room with soft surfaces like carpeted floors will help absorb noise. Some microphones and software have settings to amplify your voice – known as increasing gain – but your microphone will capture every noise in the room.
Record a minute or two of “silence” in the space you will be recording and listen to it with your eyes closed. What do you notice? Are you able to dampen the effects of any ambient noises? Turn off lights that hum, put the dog in another room, throw a thick blanket down, unplug appliances… just remember to plug them back in again if said appliance is a well-stocked emergency ice cream freezer.
Audio that contains a lot of background noise makes it harder for students to concentrate on you and what you are saying. Reduce the additional cognitive load of deciphering unfamiliar sounds by minimizing or eliminating ambient noise.
4 – Listen to playback with headphones… and listen regularly
When playing back the audio you’ve recorded, use headphones! Preferably a good quality in-ear or over-the-ear model. It’s difficult to listen closely to what you’re hearing from your computer speakers. Using headphones will help you hear subtle sounds. Chances are your students will be listening to your videos with similar equipment.
Before recording any audio, it’s also a good idea to first do a practice take to identify any quality issues that might be present. It’s often easier to re-record an audio track than to try to clean it after the fact but the prospect of starting over becomes increasingly daunting the longer you record – so nip bad audio in the bud by listening to what you’ve recorded early and often.
5 – Use an external microphone
Most modern computers and laptops have decent microphones, but they aren’t really intended to record audio. They are designed to capture a wide array of sound – which means recording a lot of noise you don’t want to capture. If you can obtain one, an external microphone can make a dramatic difference to the quality of your audio recording.
Numerous people and units on campus use Blue’s Snowball or Yeti microphones, but there are many options available for condenser microphones that will do the trick. When shopping around for a microphone, consider:
- what settings on the mic you can control (e.g. the microphone’s sensitivity)
- how the mic will connect to your recording device (e.g. via USB? will you need an adapter for a MacBook? etc.)
- whether the mic is self-standing or will require additional supports
- whether the mic comes in a kit with a pop filter (optional; see tip 7)
An external microphone suitable for at-home lecture capture will normally cost between $50 and $200. If that is out of scope, consider using the mic that is built into the headphones you may have already. Typically, these are included when you purchase a cellphone. Hold the mic close to your mouth (see below) and you can get good results.
6 – Position your microphone 4-6” from your face (or closer if you have a pop filter)
The closer you are to the mic, the more it will capture your voice and the better you will sound. You control the input volume – or gain, the loudness of the signal being recorded – through your distance from the mic. Recall from tip 3 that it is difficult to selectively boost the volume of one sound without raising the levels of the others, so aim to capture your voice loudly and clearly while recording.
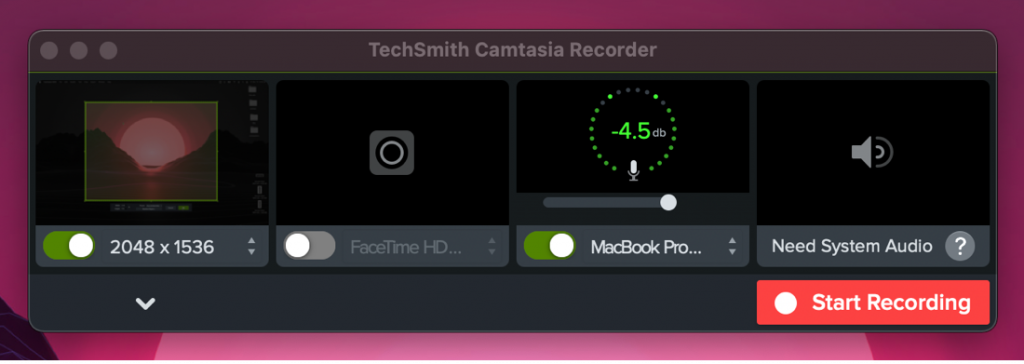
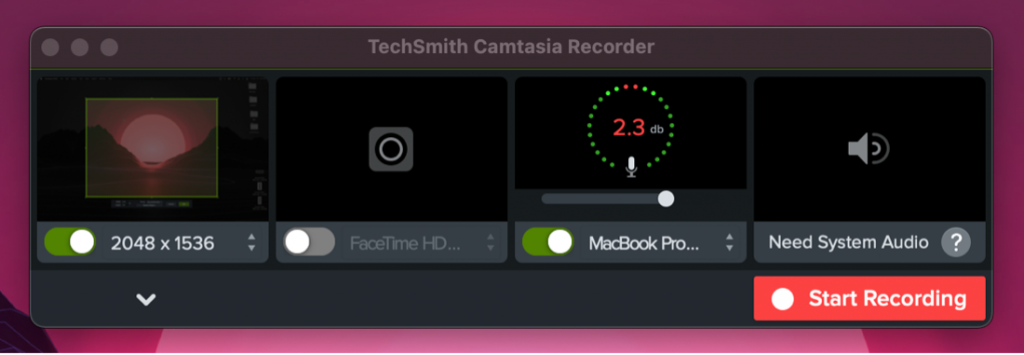
Most audio capture software applications will give some indication of your gain. Before you start recording, speak a few lines into your microphone to get a sense of your range. Ideally, your voice will light up the green bars to the greatest extent possible (-6dB to -3dB) without getting into the yellow and red areas. It is possible to be *too* loud, resulting in clipping (i.e. distortion) that is difficult to remove in a lecture capture software; the red areas warn you that clipping may occur.


7 – Use a pop filter (screen)
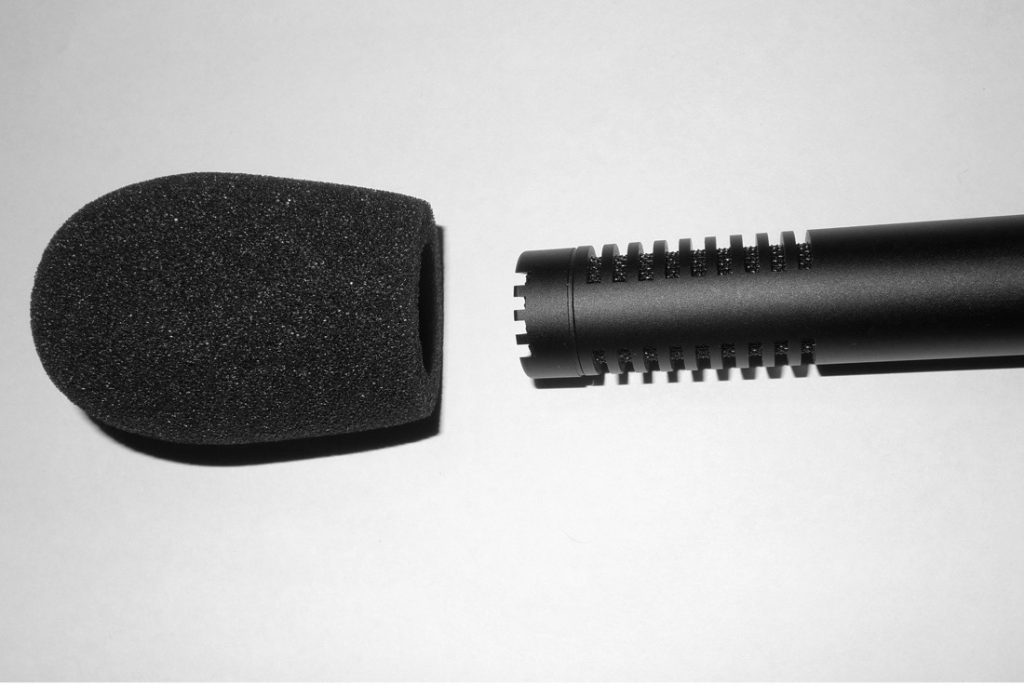
Certain consonant sounds – like “p” or “s” – can cause distortion when they are spoken into a microphone. Using a pop filter helps to diffuse the rush of air pressure and minimize the instance of plosives – popping noises from P(a), B(a) and F(a) sounds – and sibilance, or hissing noises from (e)S sounds.
You can purchase a pop filter, or you can create your own with a pair of nylons and a wire coat hanger formed into a ring. Position the pop filter about 10cm or 4 inches away from the microphone and tilt it slightly towards the microphone for best results. Speak through the pop filter into the microphone.


8 – Set your microphone’s polar pattern to cardioid (if the option is available)
So… you’ve gone to the trouble of purchasing an external microphone and, lo and behold, it seems to make little difference to the quality of your sound. Before tossing it aside in your junk drawer, verify that the microphone’s polar pattern is appropriate for your recording context.
The Blue microphones mentioned in tip 5 can switch polar patterns, or the direction in which the mic is “listening.” Set the polar pattern to “Cardioid” for a home office recording with one person speaking. Other mics may have similar settings; if “Cardioid” is not listed, choose whatever pattern is sensitive to sounds directly in front of the microphone.


9 – Verify your audio input settings
If you notice that your audio is still sounding sub-par when using a properly configured external microphone, it may be that your audio capture software isn’t using the microphone input as the audio source in the recording. Check the audio input settings in the software to confirm that the software is picking up audio from the external mic. You may need to restart your computer for it to recognize the new mic you have added.


10 – Hone your delivery style for an audio recording
Having the right tools is important to create good audio. But the tools are exactly that – tools. It’s how you use them that matters. Incorporating the following practices will also result in better quality audio recording:
- Leave a few seconds at the beginning and end of the recording to avoid accidentally missing some of your audio
- Stand, if possible, for a more energetic delivery (or sit for a more calming, relaxed voice-over)
- Speak naturally with a quick, conversational pace (about 120-150 words per minute)
- Also, however, be cognizant of the clarity, inflection and enunciation of your words and voice (this will help your students and captioning software)
- When you make a mistake (and everyone does!) pause for a few seconds and start over from the beginning of your previous sentence – it will make it much easier to cut out errors directly within your audio capture software
- Tell a story – storytelling is always more captivating than listing facts and figures. String a narrative through each session and you can elevate the teaching and learning experience
- Have fun – let your personality shine through, don’t be afraid to be yourself
- Be inclusive – avoid terms that presume gender or could be misconstrued
As you follow these tips and record sessions you will quickly learn what to do and what not to do. With practice, you will be making great videos with great audio. Communicate your passion for your subject through your voice and you will keep learners engaged!
If you’d like to find out more about creating better audio for your video, please visit the “Video Made Easy” workshop in the Professional Development for Teaching Avenue course: https://avenue.cllmcmaster.ca/d2l/le/discovery/view/course/332666.
Educational Technology, Updates
