One Button Studio
Expandable List
I plugged in the USB drive and nothing happened.
Try using an appropriately formatted USB 3 drive. USB drives must be formatted as exFAT in order to be used with the One Button Studio. Other formats will not work. If your USB drive is already formatted to exFAT it may be too slow for direct recording. Note: SD cards with adapters and novelty USB drives do not work in many instances. You can confirm the USB drive is working when the drive information appears on the bottom right window of the TV.
How to format a USB flash drive on a Mac
Sometimes you may need to re-insert the USB drive. It might have not been inserted fully.
There is no video on the USB drive.
On the TV you should see available space and time on the USB drive if it’s working properly. You may have run out of space to record.
Also ensure the USB drive isn’t defective by testing it out on another computer.
There’s no audio signal.
Double check on the audio levels on the TV that there is an audio signal registered. If the levels are low your position may be out of reach of the microphone on the ceiling. Make sure to stay within the black square marked on the floor.
I’m playing the video but it has no audio.
Verify that the playback computer volume is audible. Also make sure that you’re using a video player like VLC Media Player.
The sound is not in sync with the video.
Avoid using Windows Media Player to play your video. Sound playback issues may be due to memory leakage in Windows. Reboot your computer or try playing the video with another application like VLC Media Player.
Play video directly from the desktop instead of the USB drive. Sound playback issues may result from USB drives being too slow. This will manifest as video stuttering or appearing out of sync. Copy the .mp4 from the USB drive to the desktop and then open the .mp4 on the desktop.
Nothing happens when the Record button is pressed.
The record button on the iPad should turn green once it’s recording. You’ll also see visual indication on the TV. If nothing happens try tapping again. You may have tapped too lightly or quickly on the touchscreen.
Sometimes if there is too much space already used on the USB drive, it may be slow and cause a delay to start recording. Try making sure there is a significant amount of free space on the USB drive before recording.
Controls are not working.
Try refreshing the webpage or turning on and off the wifi. Sometimes the iPad automatically shuts off the wifi after being in stand by for a long period.
Scenes aren’t changing.
Try tapping the scene buttons multiple times. This triggers different on-off states for each input.
The video is out of focus.
The autofocus on the camera may lose you if you move out of the frame. Try centering yourself in the frame and the camera should focus on your face again. If you are still out of focus please contact: Tony Hoang @ hoangtt@mcmaster.ca
The video stutters.
Play video directly from the desktop instead of the USB drive. Sound playback issues may result from USB drives being too slow. This will manifest as video stuttering or appearing out of sync. Copy the .mp4 from the USB drive to the desktop and then open the .mp4 on the desktop.
If this solution has not resolved your issue please contact: Tony Hoang @ hoangtt@mcmaster.ca
The lights didn’t turn on.
On the small white remote, push ON for buttons 1, 2 and 3.
Please contact: Tony Hoang @ hoangtt@mcmaster.ca
The lights didn’t turn off.
On the small white remote, push OFF for buttons 1, 2 and 3.
Please contact: Tony Hoang @ hoangtt@mcmaster.ca
The OBS software isn’t available – or it crashed.
Try refreshing the web page on the iPad. Also try turning on and off the wifi again to secure a connection.
How do I use my laptop for slides?
Connect the HDMI cable coming out of the side of the AV Cart. This is listed as CAM2 on the iPad control interface. Click the RED CAM2 icon to switch to this video source.
My video didn’t save to the USB drive. Can I retrieve it?
To ensure user privacy we don’t save copies of the videos that are recorded in the One Button Studio. If your video doesn’t save to your USB drive you will have to record the video again.
Where can I get a USB drive?
You can purchase USB drives from the Campus Store located in Gilmour Hall B101.
How do I upload a video to MacVideo?
The MacPherson Institute also supports a platform called Kaltura to upload and stream your media. You can visit www.macvideo.ca to upload, stream and manage media all in one place.
AUDIO STUDIO
Expandable List
What is the Rodecaster pro?
The RØDECaster Pro™ is a hardware controller designed to simplify podcast production whilst delivering superb audio quality. It supports up to four presenters, as well as offering easy connection to phone, USB and Bluetooth™ sources. Eight programmable pads offer instant playback of sound effects and jingles. Podcasts can be recorded directly to microSD™ card, or to a computer via USB. Ease of use is assured, with intuitive controls and large full-colour touchscreen.
What features does the Rodecaster Pro have?
- 4 x XLR inputs for pro microphones (we currently have 2 microphones)
- Separate inputs for:
3.5mm TRRS (phone or device)
Bluetooth (phone or device)
USB (for music/audio or app calls) - Easily adjust levels – no extra gear or messy set-up involved
- Programmable sound effects pads: 8 colour coded sound effects triggers for programmable jingles and sound effects
- Multistage dynamics: compression, limiting and noise-gating
- Full Colour, High-Resolution Touch-screen
- Four high-power headphone outputs and stereo speaker out: each with independent volume controls
- Records direct to microSD Card for completely self-contained operation, or to your preferred computer and software via USB
- TRRS, USB, and Bluetooth Connectivity
You can see the full feature list here.
How do I turn on the Rodecaster Pro?
The Rodecaster Pro might be off when you enter the studio. To turn it on hold the red circular button on the back top right of the device. Here’s an image from the back.
How do I use the Rodecaster Pro to record a podcast?
The hardware is already setup so all you need to do is turn on the Rodecaster Pro and hit record. Here’s a link to the official Rode quick-start guide.
How do I ensure the recorded audio is at an appropriate volume?
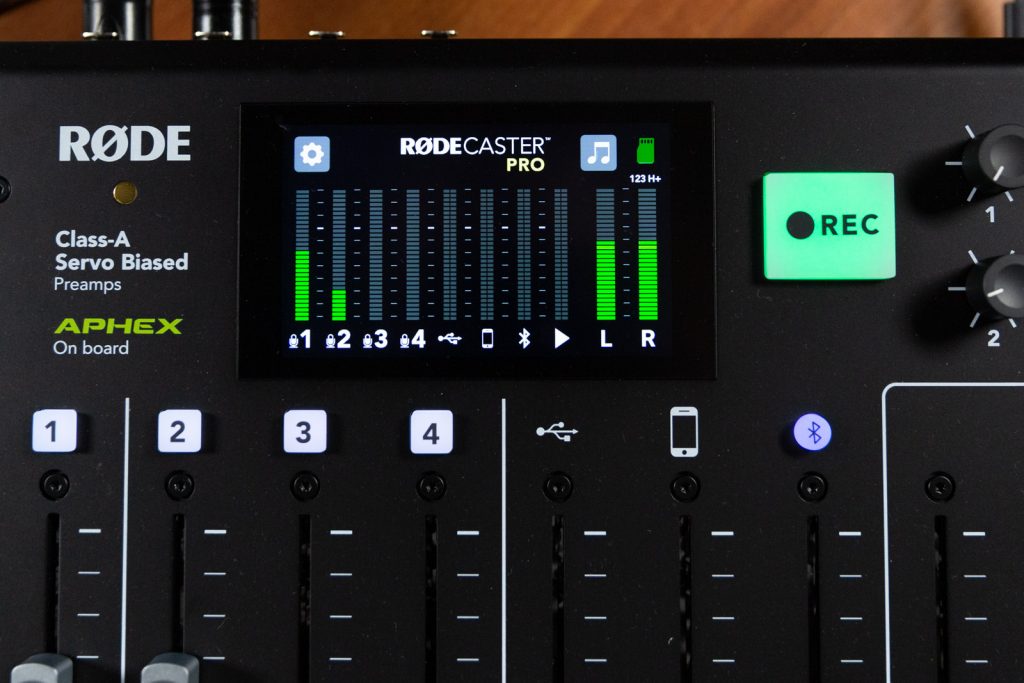
You can monitor your microphone audio levels (also called metering) by keeping an eye on the visual touch screen. There are physical fader controllers to adjust the volume of each microphone.
You can listen back to the audio you just recorded by tapping the Settings icon (gear icon), then tap Podcasts and you can then scroll through the files saved to the device. Each recording is saved with the date and time of the file.
Once you’re done recording and you’d like to take your audio files, simply switch the Rodecaster Pro into USB mode.
1. Tap the green microSD card icon in the top right hand corner.
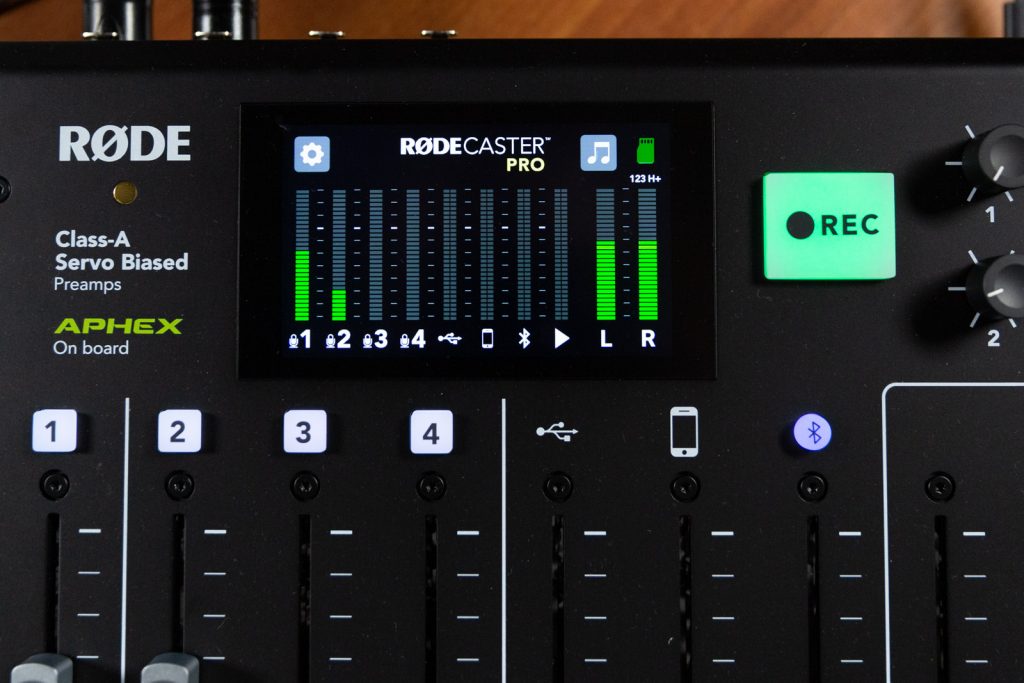
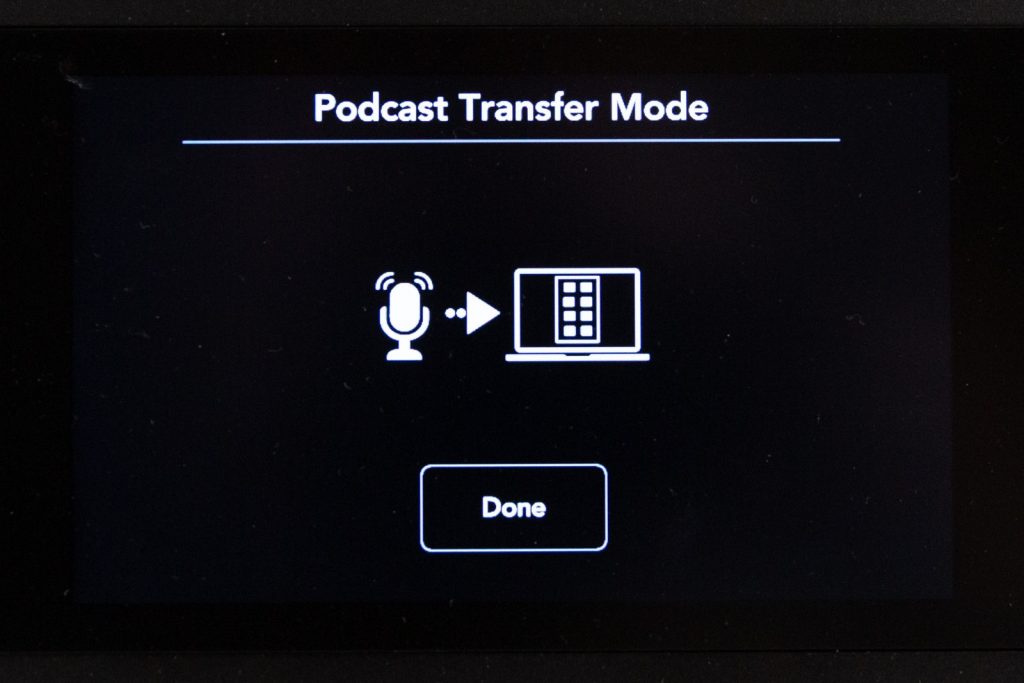
2. Next to “Podcast Transfer Mode” tap the toggle to the right to enable USB mode.
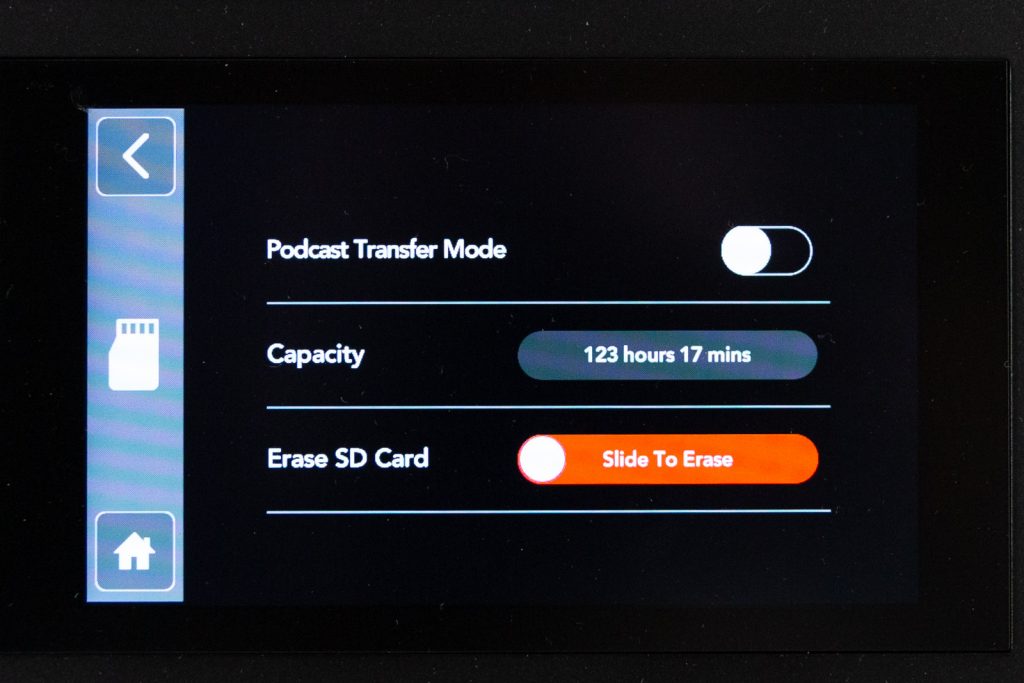
It will show a confirmation screen whether you’d like to switch to Podcast Transfer Mode. Tap yes.
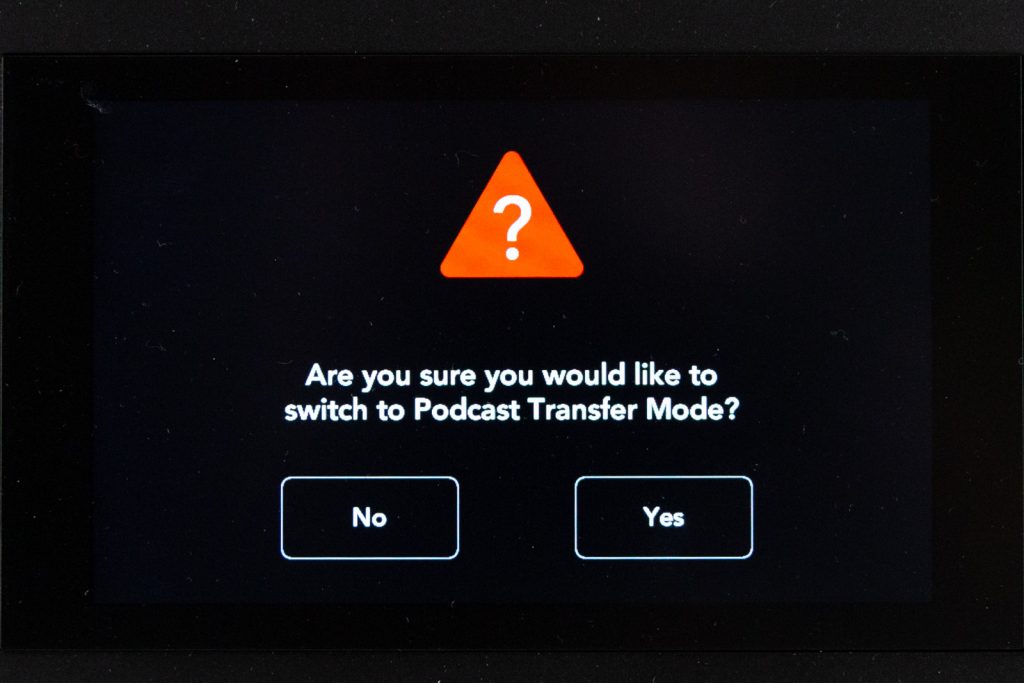
The screen will then show you’re in the Podcast Transfer Mode.
The Rodecaster icon will appear on the desktop like any regular USB Drive.
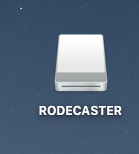
You can then drag and drop the files onto your own storage device utilizing the Card Reader that also has USB ports on the desk. The files will appear as WAV files and a generic file name. You can recognize your files by the date and time for each file recorded. Once finished you can exit UBS Transfer Mode by tapping Done on the Rodecaster Pro.
What software is provided?
Our iMac computer comes preloaded with:
- GarageBand
- Camtasia
- Kaltura Capture
- Echo360
How do I use GarageBand?
You can launch GarageBand directly from pushing the GarageBand key on the Streamdeck. Apple provides an excellent resource on how to use Garageband. View their instruction guide here.
How do I record, edit and share in Camtasia?
How do I enable microphone and camera recording in Camtasia?
If you want to record video with Camtasia, make sure the camera is turned on. You can see the power switch on the front grip. If you’d like you can also use the RODEcaster at the same time to record audio. Make sure the RODEcaster is on and the fader for the microphone you’re using is up and that it is receiving an audio signal.
When going to record, make sure the Sony a6400 is turned on and select Cam Link 4K as your camera source and RODEcaster as your microphone source as seen below if you’re planning to use the separate mics connected to the Rodecaster. You can also choose to use the camera microphone audio input if you don’t want to use the individual microphones. Simply choose Cam Link 4K as your audio source.

Sometimes if you stop and continue recordings, you’ll have to re-click the Cam Link 4K as your video source to trigger the camera again. If you don’t do this the Sony camera might not record for your next recording.
How do I use Echo360 Universal Personal Capture?
Echo360 provides excellent tutorials on how to use their software. You can view the tutorial on how to use Personal Capture here.
What microphones are in the audio studio?
We currently have 2 Rode Procaster microphones set up. The left microphone is Mic 1 and the right microphone is Mic 2.
Why am I not getting any input signal from the microphones?
Make sure that the RodeCaster Pro is turned on. Also check if the level fader for the desired microphone is up. You should see a visual display of audio input on the RodeCaster Pro screen. If you’re recording into software, make sure you select the RodeCaster Pro as your audio input device.
Are there any recommendations or tips when recording my audio?
Being aware of your distance from the microphone and how you speak is important. View the video below to see some microphone techniques.
What is the Streamdeck?
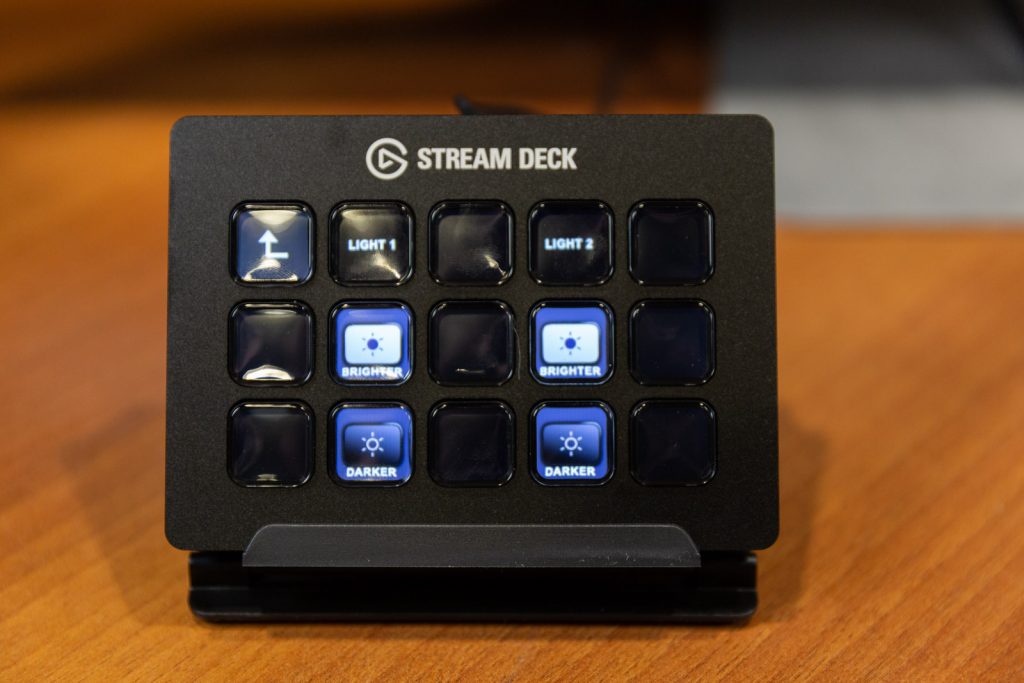
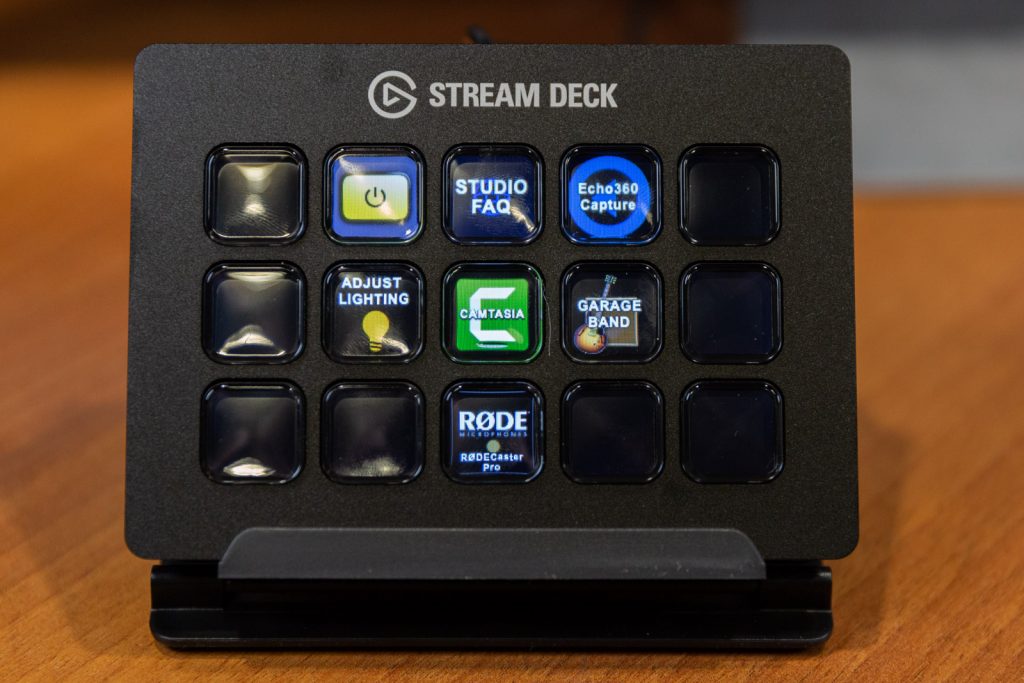
The Elgato Streamdeck is a hardware controller that provides one-touch tactile operation for specific commands. Our setup allows you to wirelessly control the lights in the room as well as launch the main software installed on the iMac.
How do I turn on the lights?
Hit the LIGHTS ON/OFF button on the Streamdeck. If the computer has been asleep for awhile it may take a few minutes for everything to reconnect. The connection to the lights is through wi-fi so sometimes the computer will need to reconnect to all devices.
How do I adjust the brightness of the lights?
Hit the ADJUST LIGHTING button on the stream deck. You will see two rows of keys that control each light. LIGHT 1 controls the light on the left and LIGHT 2 controls the light on the right. Use the BRIGHTER or DARKER buttons to adjust each individually. Each press will adjust the lights +/- 20%. To go back to the previous menu push the return button key on the top left hand corner.
